Protech F.
It took a bit longer than expected to get here, but it works like we wanted it to. It's going to be a great tool for us.
Ron M.
Well, it works as it should. I had a little difficulty getting it started. Some water got in the suction hose, and I had to clear it, but it worked okay.
Robert J.
Looks like a ripoff, I told you to cancel the order! I didn’t know I had to fix it with duck tape , then have to buy nozzles! It turns into a money pit, it probably didn’t cost $20 bucks to make
Aussie K.
Tried with sand up to 2.1 mm just kept clogging it hasn’t impressed me at all
Tom O.
This kit is awesome. Stripped this drill rod box with 2 bags of black beauty medium grit and a 4400 psi 4.8 gpm Harbor freight gas powered power washer. Tried play sand and a 2200 psi electric 1.8 gpm and didn’t work well. Very happy and impressed. Took me no more than 1/2 hr to strip that whole front
Kevin C.
This sandblaster works VERY well, going to save lots of time while restoring my pickup! Thank you!
Dan N.
I blasted my trailer all the rust and paint is off let it dry and it was ready for chassis saver worked fantastic
Richard T.
I haven’t used it yet, however it looks high quality and feels sturdy so im feeling like it will do the job.
Kenneth M.
Great product. Came as shown and works as proclaimed
Richard G.
**** I had a few reservations about this device, but all I can say is Wow !!IT WORKS GREAT, I use play ground sand from my local hardware store !! *******
Douglas C.
Works really well and I am really happy with the results
Walter B.
Good communication throughout the process. Quality appears to be good but I haven't had the chance to use it yet. Good process though with a positive experience.
Rick D.
Can't really rate it at this time simply because I haven't had the chance to use it yet, but as soon as I do you'll be the first to know....
james h.
still waiting to recieve it
michael p.
Never received it
Stephen R.
It did work. But it took 50lbs of medium glass media and a half tank gas in my pressure washer to get a small area clean. I think I can do better with a wire brush on my 4 1/2" grinder and some Evapo-rust. Also, I sent 3 emails to support asking about their return policy and got no response. I did, however, get this email asking for a review.
Carl G.
Just not happy with it
Dan R.
I ended up screening to remove anything larger than a sand grain and it began to feed very well.... I had sun dried to sand on a tarp, I had to really make sure the sand was dry, dry, dry....... When it was feeding it removed paint and rust from my old Jeep frame, I'm going to try soda next and see if that is any better.
Desmond .
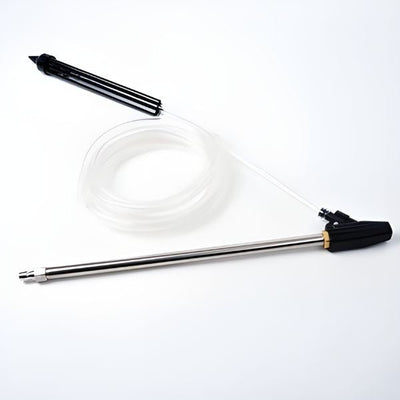
I use this with a 3,300psi pressure washer with a long wand. I use it for removing paint and rust off metal fencing, vehicles, tools, and various farm implements. It works great, one thing to note is to point the sand hose upwards on the wand end so that the water cannot drip back down into the sand hose. I recently sprayed an entire spiral staircase in less than 4 hours saving days of work with a grinder, my back, and the finish left is much more uniform than I would have gotten with a grinder. For vehicles, you can use outdoor 3m painting tape and angle the water away from the tape to sandblast panels or entire vehicles.
The strength of the pressure washer used makes a huge difference in how well it works. The bigger the compressor, the more sand it can pull at a time, and the harder it's going to hit the surface when sprayed. I don't think I would want to bother with this tool if my pressure washer was any smaller. I've owned and used a few of these over the years and this one is better quality than the other brands I've tried. I have yet to have a single nozzle clog. 10/10
Timothy W P.
I have not used it yet. But looks good
James .
USed this to strip an old boat trailer of paint and rust. Worked better than I had hoped. Not a sgood as a true sand blaster but I dont have one of those but did have a pressure washer. Kit has all the doohickys and geegaws you need to make it work, just supply your own pressure washer gas water and sand.
Norma P.
Over all I like this. Dry sand blasting is hazardous to your health unless you wear a respirator. Doing it with water to control the dust is how most professionals do it.
The parts are good quality. Not that it's very hard to figure out. But it did come with a ebook full of information like how much water vs sand in the bucket is optimal vs trial and error method. I think beach sand would work well if sifted with this but the beaches around here are frozen solid so it'll have to wait for a few months.
I used my 1500 psi pressure washer to see how well it would do. It worked. I think the larger gas powered one would do a much better job but that's put up until spring. The safety glasses work but a full face shield is a much better way to go. Unlike sand blasting the water seems to deflect back towards you easier. Kind of like how spraying a hose while washing a car will sometimes squirt back at you. I was easily able to remove light to medium rust from a receiver hitch. I think heavy scale could be done.
I'm looking forward to this spring so I can try it out on a steel arm assembly that has a tube that slides inside another. It's rusted enough so they no longer slide and it's welded so they can't come apart. I think this will get the grit in between the metal so I can free them up.
Read less
Ramiro G.
It would be helpful if instructions were included along with a list of other items needed for usage . So now it’s up
To me to figure out how to make use of these things that were sent to me.
Michael H.
Haven’t used it yet. Just got it.
william s.
This system works excellent very happy with it
William F.
I think it works great and works even better when you gravity feed the sand . I'm very pleased with the product
David N.
I am amazed how well it works,I'm using it with a 3500psi washer and it will just blast paint and rust right off.
Roy V.
I have not tried it out yet, but am pleased with the construction of the unit. Looks like it should perform well.
Jason D.
Wow, just wow. I decided to use this product to speed up my refinishing of a Jon Boat. It turned a 3-day project into a 1 hour project. I will be using this product for every sandblasting project from now on. All you need is some play sand from the hardware store and I sandblasted a 14 ft Jon Boat with 150 lb of sand.
Eric W.
This sand blaster is very good, works extremely well and allows me to do the work with a greatly reduced chance of breathing the silicate from the sand, the only thing I would change is the pickup tube it seams to be on the short side , good product!
Ricardo S.
Bought this thinking I would be shocked if it worked as intended. Well, I was pleasantly surprised. My son blasted a whole jeep and it did well. We used coal slag as blasting media. Bought it from Tractor Supply. Worked really well. Pick up tube never plugged. Also have a 4000psi pressure washer.
Fred C.
Got this product this morning. I already used it and I'm my opinion it works GREAT!! I haven't had any issues with and it cleaned a piece I've been working on for 2 weekends in like 10 minutes and I'm ready to paint . I use playsand and it works great, little messy , you get a mess using anything, it sucks out the sand pretty quickly but it gets the job done . That's what matters ..if you are looking for an easy way to sand hard to get places and big places it's for you , if you are looking for something that's gonna be clean and do it for you , might want to hire someone..Lol.. all and all if you know your way around tools , this is a good and cost efficient tool to have .
Scott G.
Goes together easy, easy to use, only problem I had was that it uses a lot of sand for the amount of cleaning you get. Maybe a ball valve on the suction line to limit the sand flow not sure. Not really worth the cost my pot sand blaster does a better job with no water mess and I can control the sand flow.
Timothy S.
Didn’t get any instruction's,but it has worked as advertised
RBJ AUTO COLLISION A.
I have not received my order and everytime I reach out to this company they're giving me a tracking number which isn't what I want, my product is what I want or a full refund.
Michael
Well, I'd go with a ZERO, but not a choice.
It's showing as 'delivered' to somewhere in New Jersey. Seeing how I live in KY, I'm not happy at all!
Sent emails to the support email address and just replied back to several of the emails they sent me and Yahoo sends it back as ' no such address:
Hopefully I hear from this review so I can get my stuff
Charlie B.
Worked very well. Uses allot of sand so a restriction of some sort in the pickup tube may be in order. My biggest improvement from the original plastic one is the sand hose. My plastic one would work good with that hose.
Don H.
Like the concept but haven’t used it yet
Eric A.
I was skeptical when making this purchase but shipping was much faster than I expected and the quality of the sandblaster was much higher than I expected. I media blasted a car door and the blaster worked great. I am really happy with this purchase.


